How to replace soldering tips on the HU-200
-
Tools required
-
- A new soldering tip for replacement
- Tip adjustment jig unit
・Part No.CX5017 for TX1 series tips
・Part No.CX5018 for TX2 series tips
- Hexagon wrench for 2.5 mm
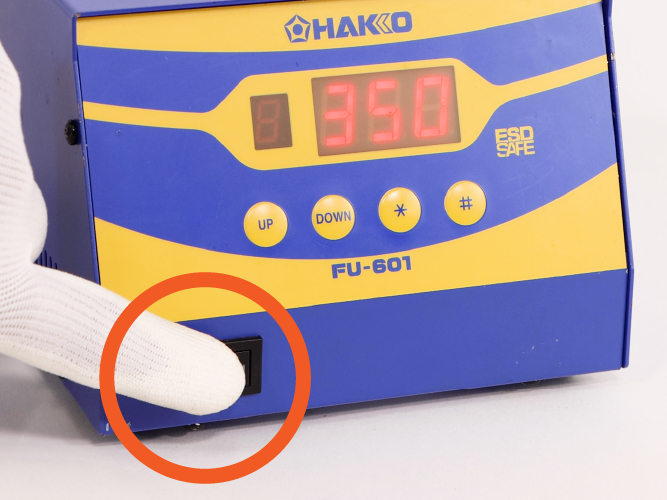
When changing soldering tips, turn off the power
of the FU-601 and start the work after confirming
that the soldering tip has cooled down enough.
-
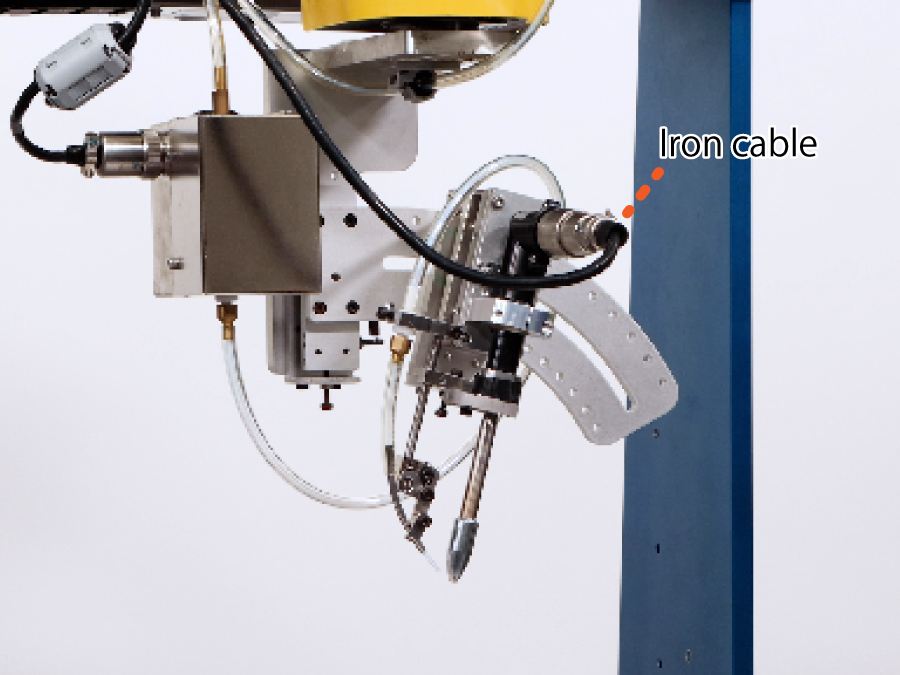
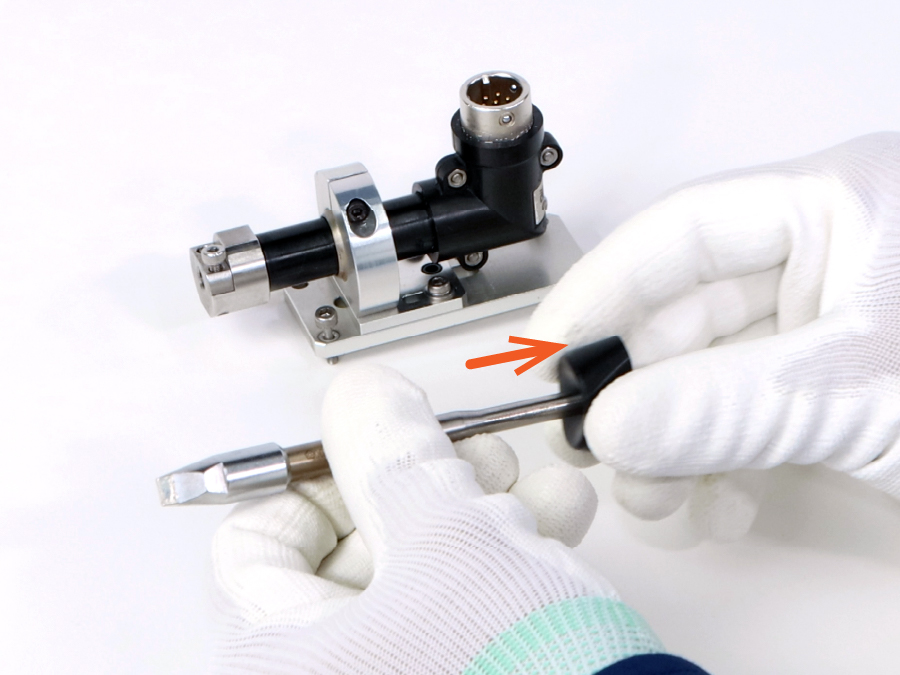
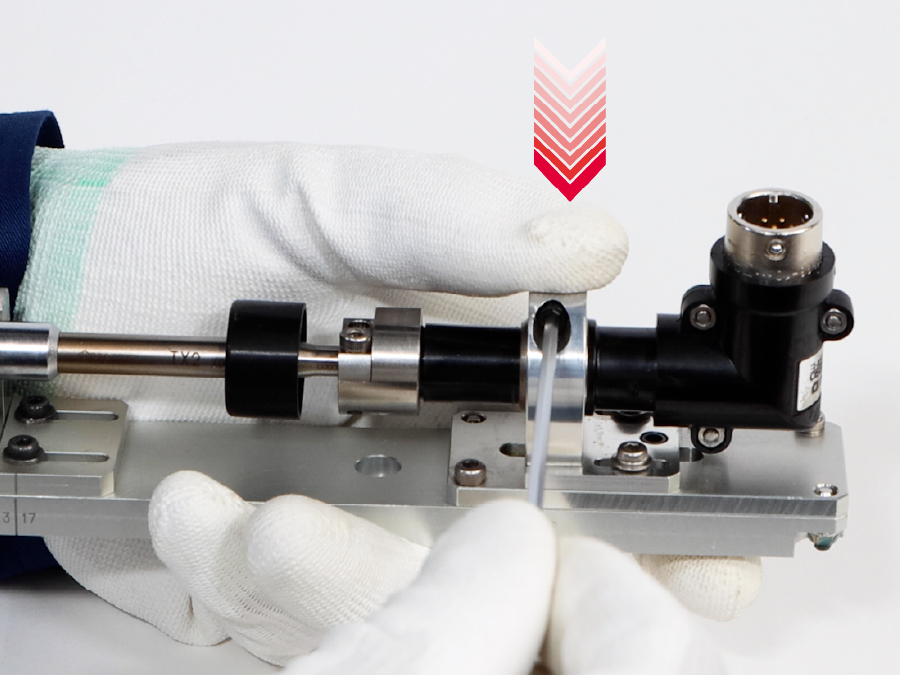
Remove the iron cable from the soldering iron.
-
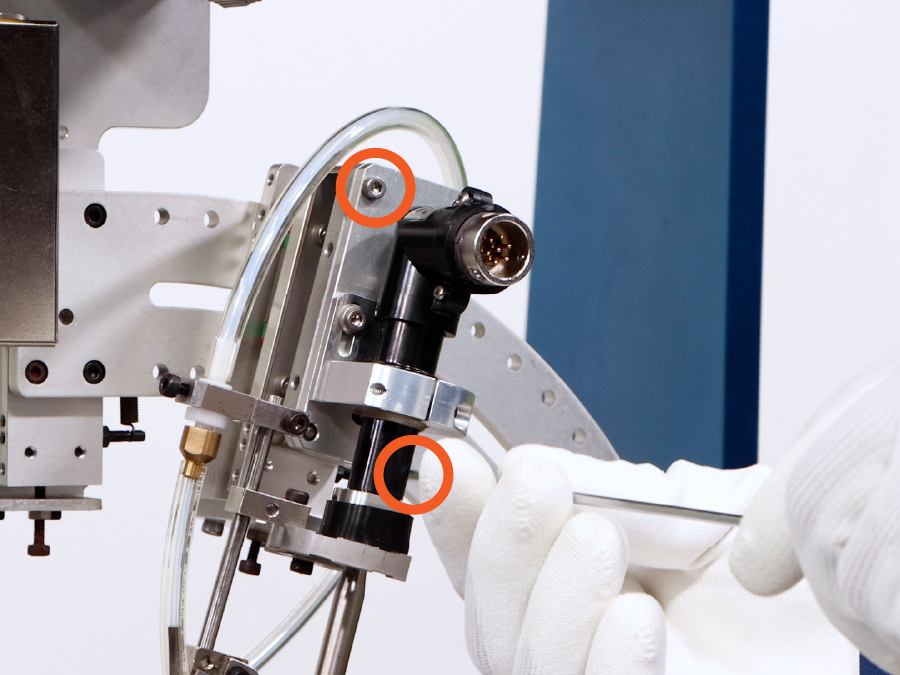
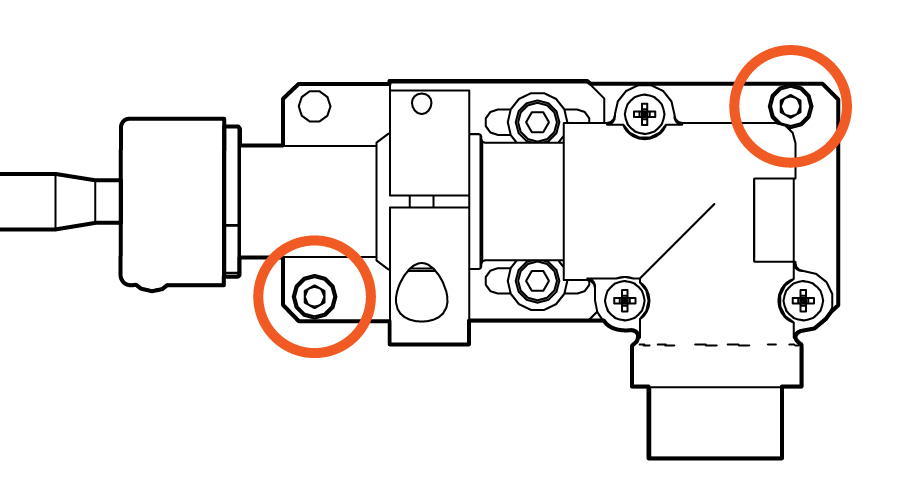
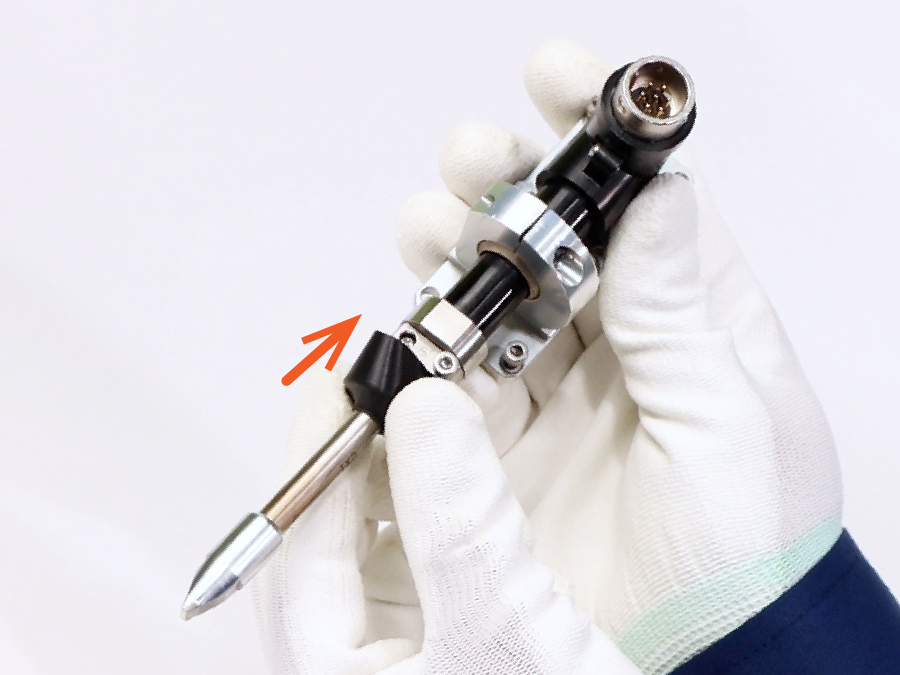
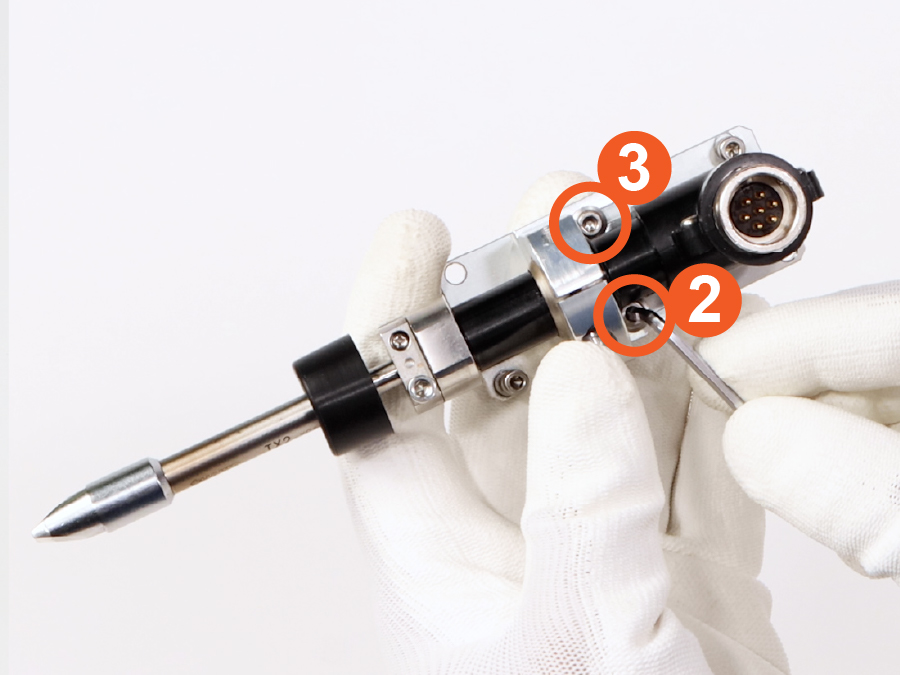
Loosen the two screws to detach the soldering iron as shown below.
-
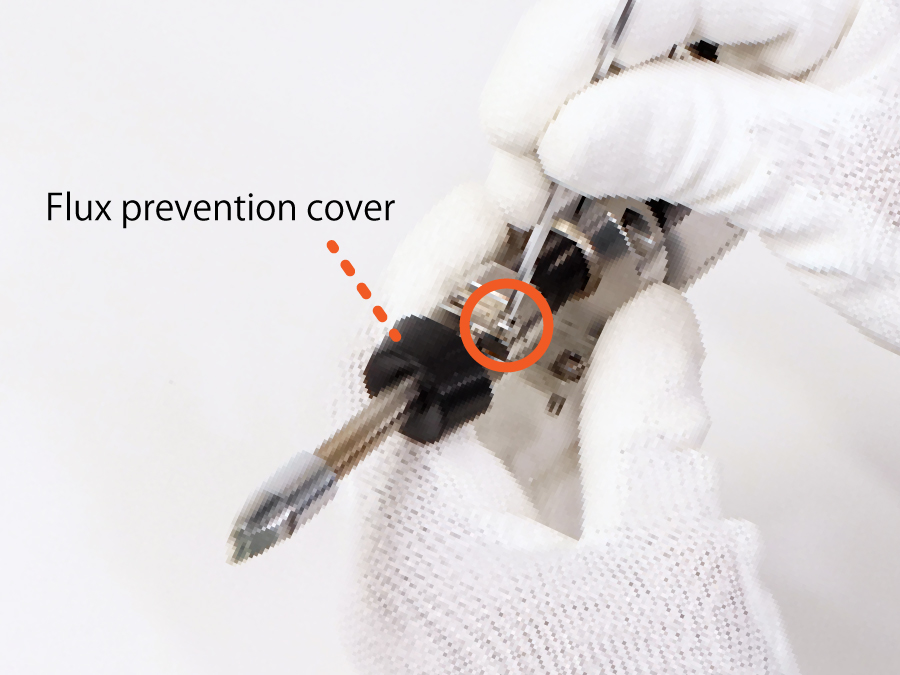
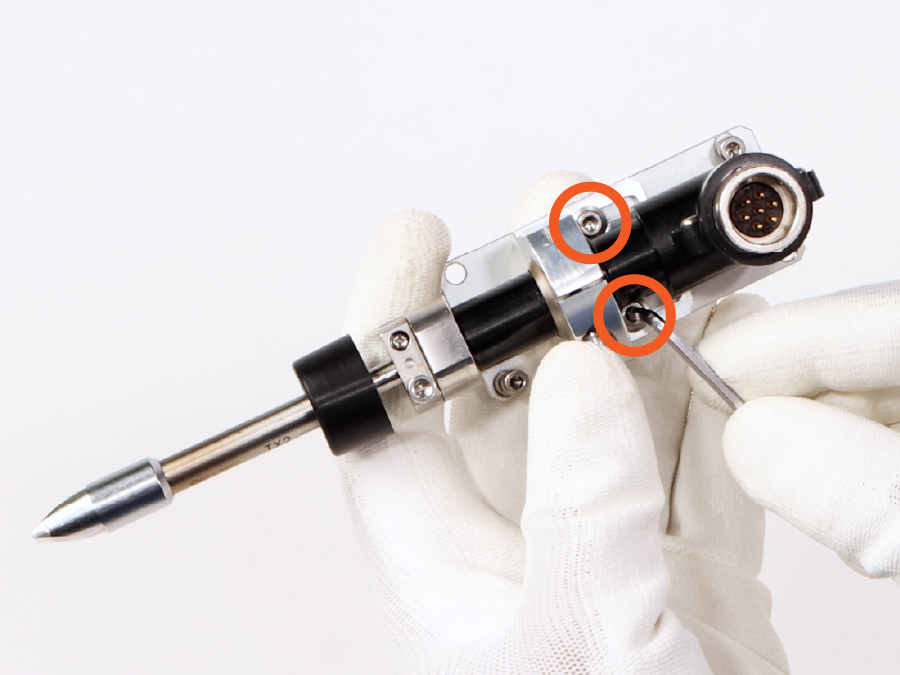
Remove the soldering tip and flux prevention cover.
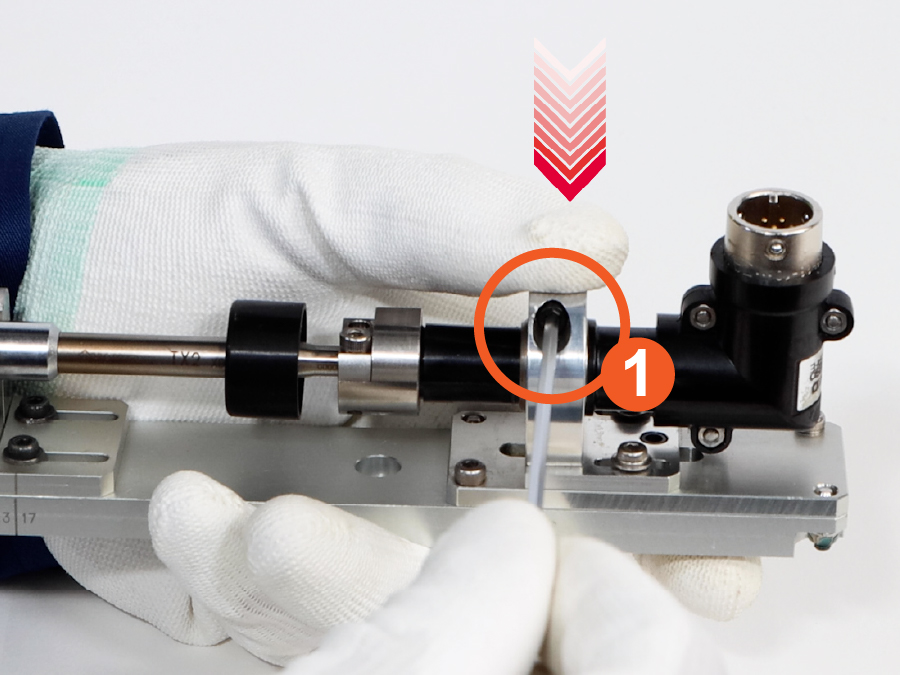
(1)Loosen a screw fixing the soldering tip.
Slide the flux prevention cover and loosen the tip lock screw.
(2)Remove the tip and flux prevention cover from the soldering iron, and pull out the flux prevention cover from the tip.
-
Pass a new tip through the flux prevention cover, and insert the tip into the soldering iron.
Make sure it reached to the very end.
-
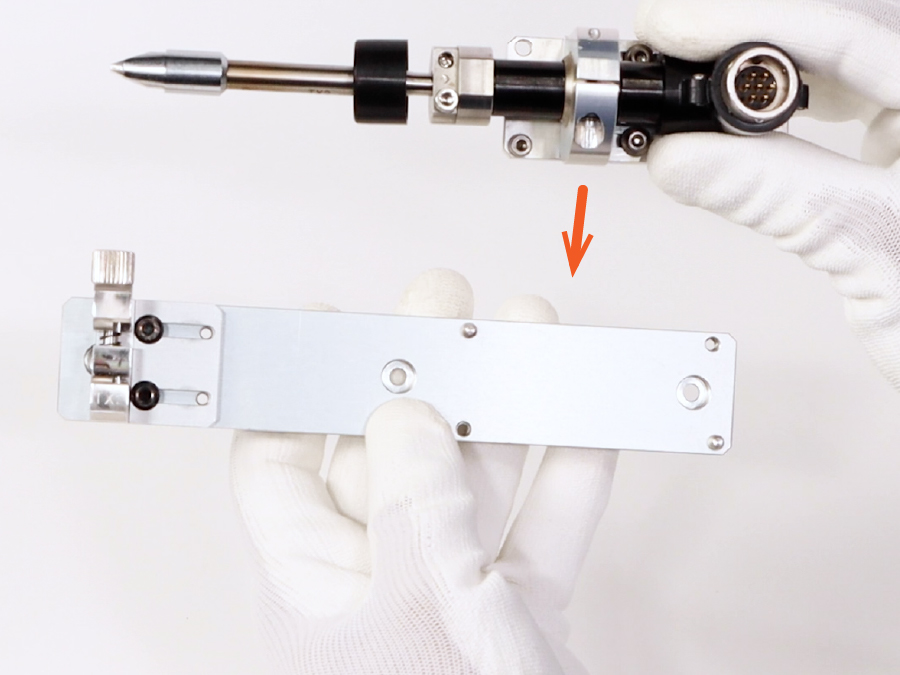
Adjust the tip's position and direction with the tip adjustment jig.
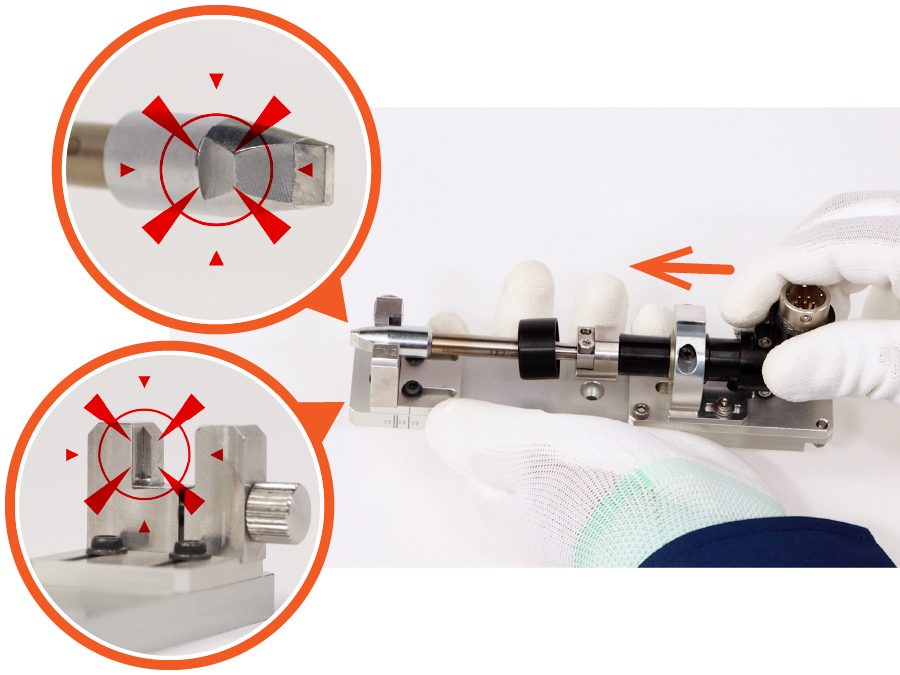
(1)Loosen three positioning screws.
 Two posioning screws on the upper surface
 Another positioning screw on the side
(2)Attach the soldering iron over the tip adjustment jig.
At that time, ensure that the positioning pins and the iron's screws are aligned.
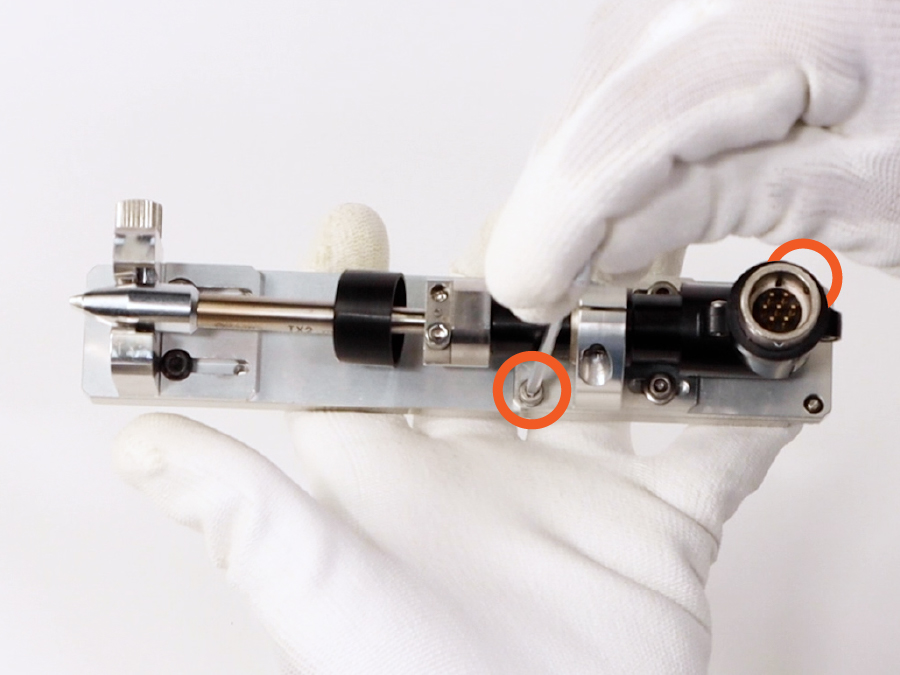
(3)Tighten the two screws to fix the iron on it.
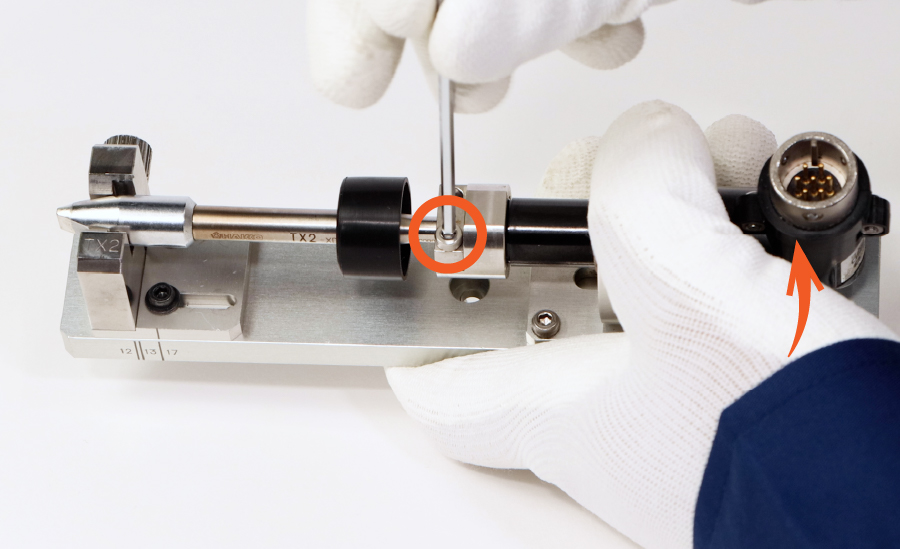
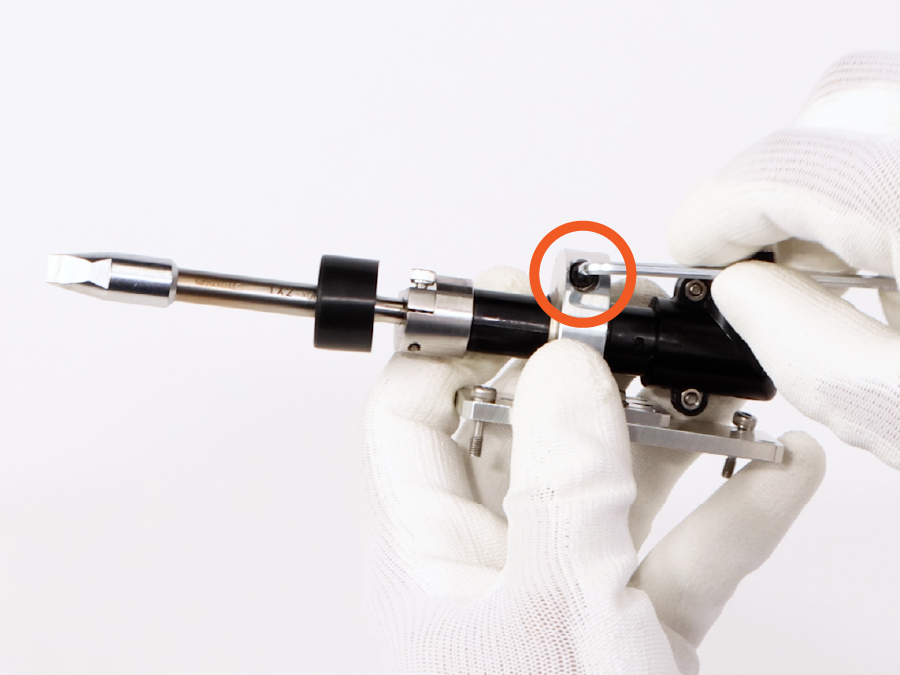
(4)With the connector on the iron facing up, tighten the screw to secure the tip.
(5)Slide the connector to fit the D-cut surface of the tip to the concave of the jig.
(6)Pressing the D-cut surface of the tip to the fixed side of the jig, tighten the adjusting screw pressing down the tip not to lift.
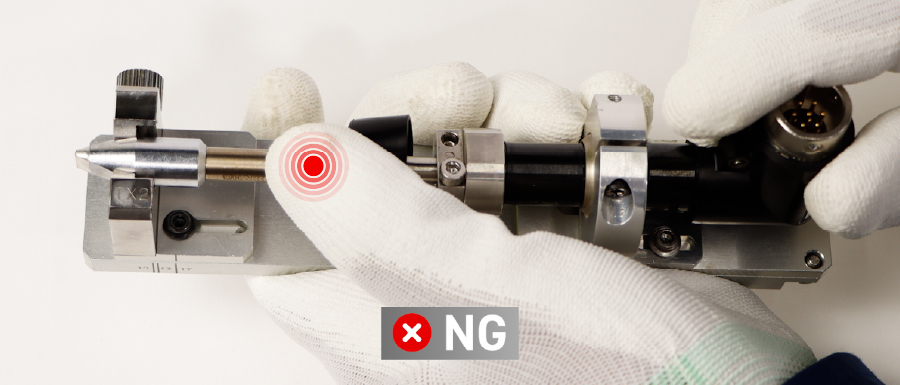
Be sure to hold the tip end to proceed with
the work, as pressing the pipe cause it to
bend.
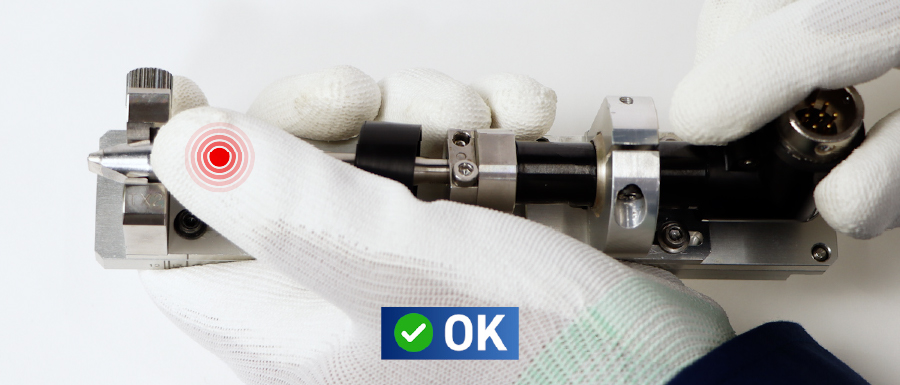
Fix the soldering tip with the adjusting screw so both sides of the D-cut surfaces fit into the jig.
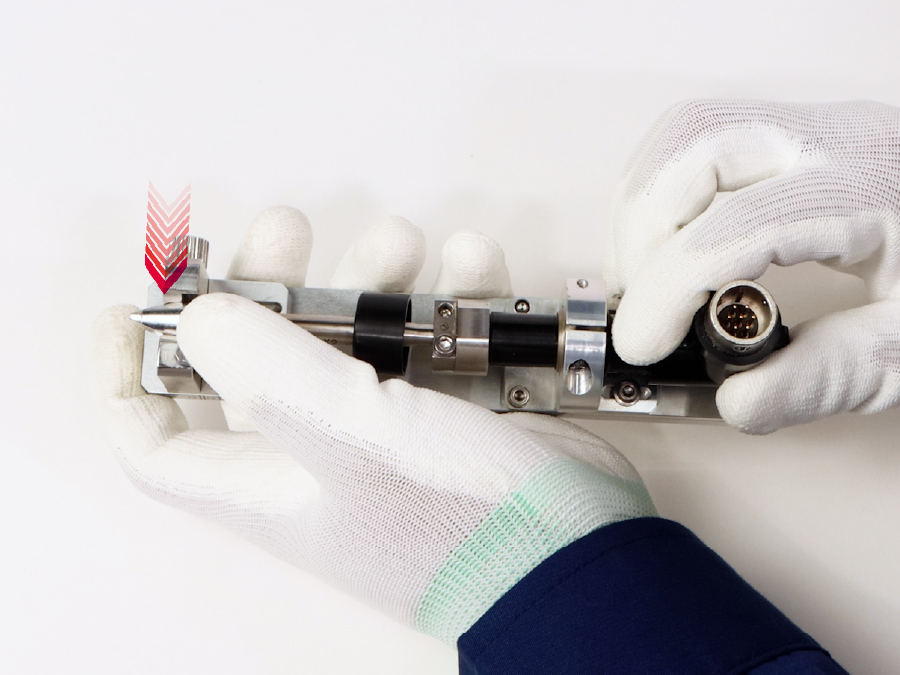
(7)Tighten the positioning screws in order of the side and upper surface of iron little by little.
Tighten the screws while lightly pressing down from above, so that the soldering iron does not lift off the tip adjustment jig.
Don't try to tighten them all simultaneously, but do it slightly and evenly.
 One positioning screw on the side of the iron
 Two positioning screws on the upper surface of the iron
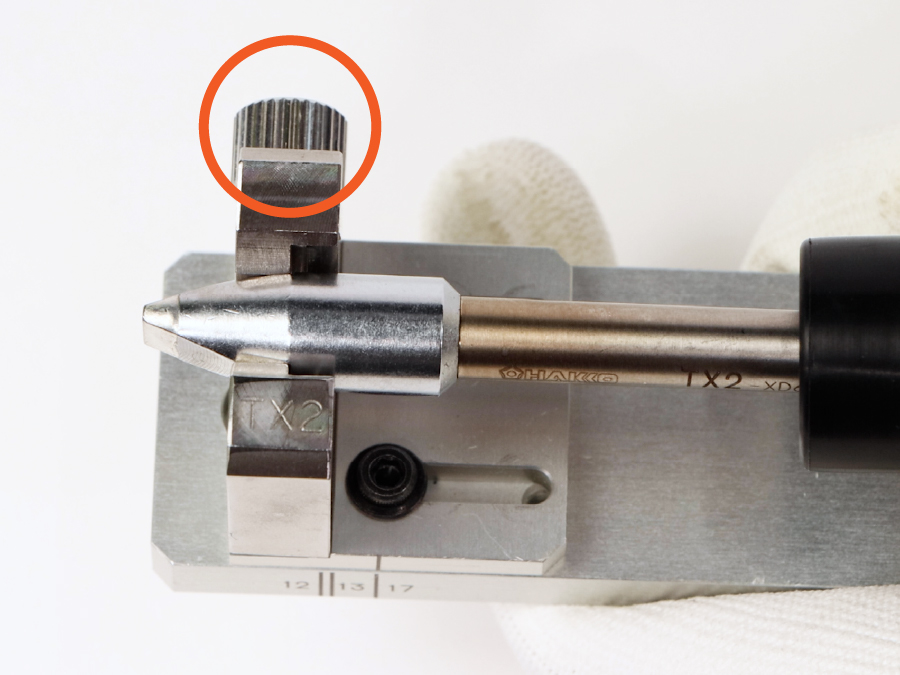
(8)Retighten the positioning screws at the three points little by little,let the iron not warp.
When retightening the screws, press down the iron lightly, not to lift.
-
Remove the iron from the tip adjustment jig.
(1)Loosen the screw which secures the tip.
(2)Loosen the two screws which are holding the iron, and detach the iron.
-
Attach the flux prevention cover.
-
Set the soldering iron onto the HU-200, and secure the two screws to hold the iron.
-
Connect the iron cable to the iron to complete tip replacement as the last step.
Please check the movie for tip replacement on our website.