HAKKO

Login/Sign Up

MAINTENANCE/TROUBLESHOOTING/APPLICATION EXAMPLES

Top of Support & Service  >  MAINTENANCE/TROUBLESHOOTING/APPLICATION EXAMPLES  >  How to change the solder on the HU-200

How to change the solder on the HU-200

Change the solder bobbin following the steps when using up the solder.

Part names

How to change the solder

Need to prepare
  • Solder
  • Hex key wrench WAF 2.5 mm

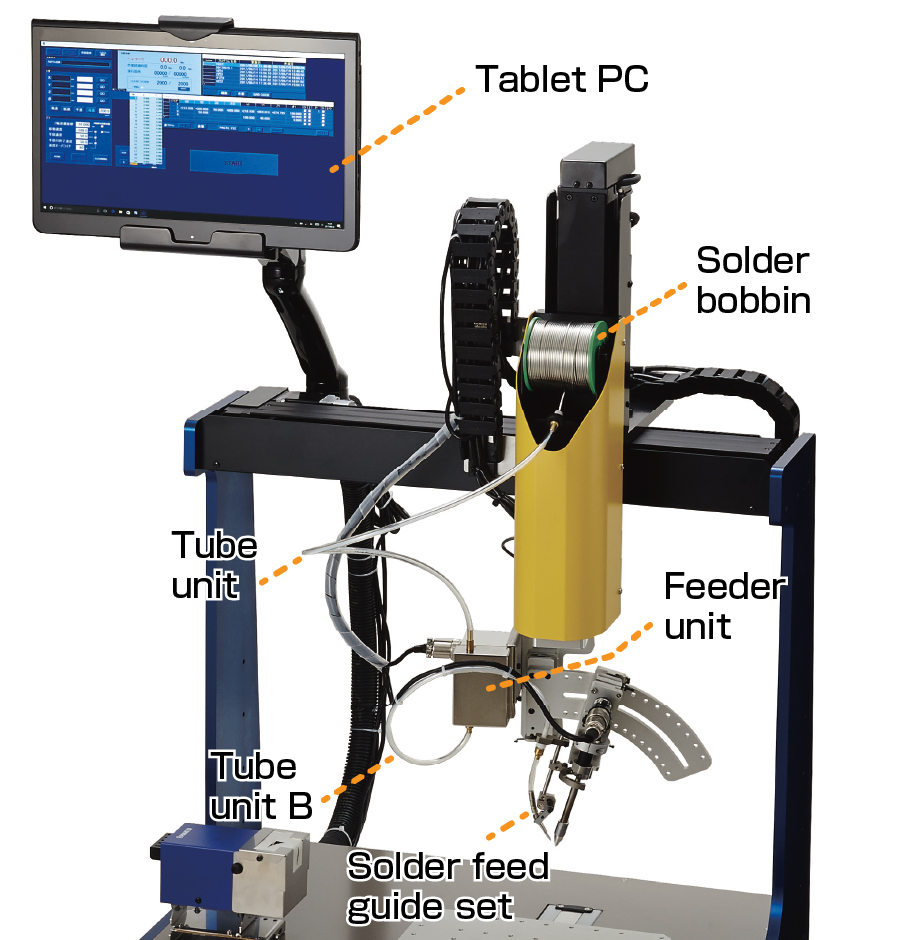
Whenever changing the solder bobbin, turn off the power of the FU-601 and start the work after confirming that the solder tip was cooled down enough.

  • We demonstrate the process in the images with the soldering iron cable detached for better clarity.
  1.  Tap the 'HOME' button on the tablet PC to let the soldering iron return to its origin.

     
  2. Tap the 'Solder Feed' button on the tablet PC to feed the solder.

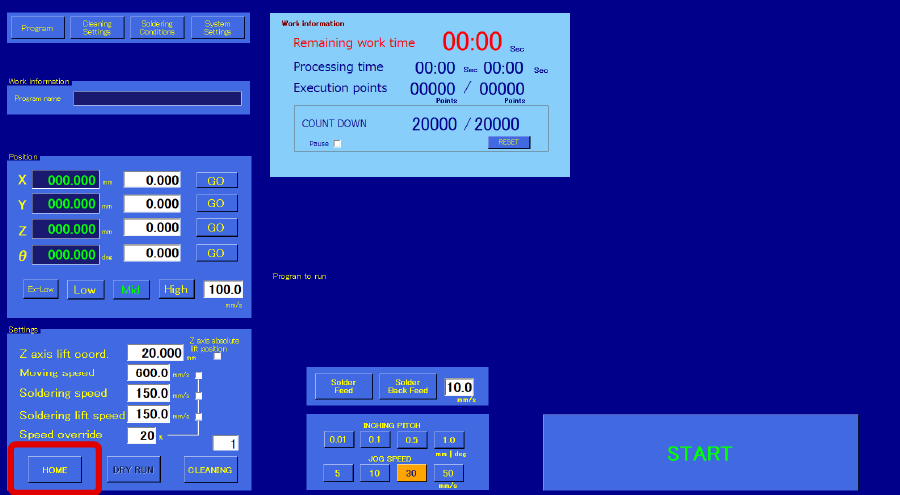
    Keep feeding until it stops, and tap the 'Solder Feed' button again to stop feeding.

  3. Loosen the 2 screws on the feeder unit cover with a hex key wrench and remove the cover.

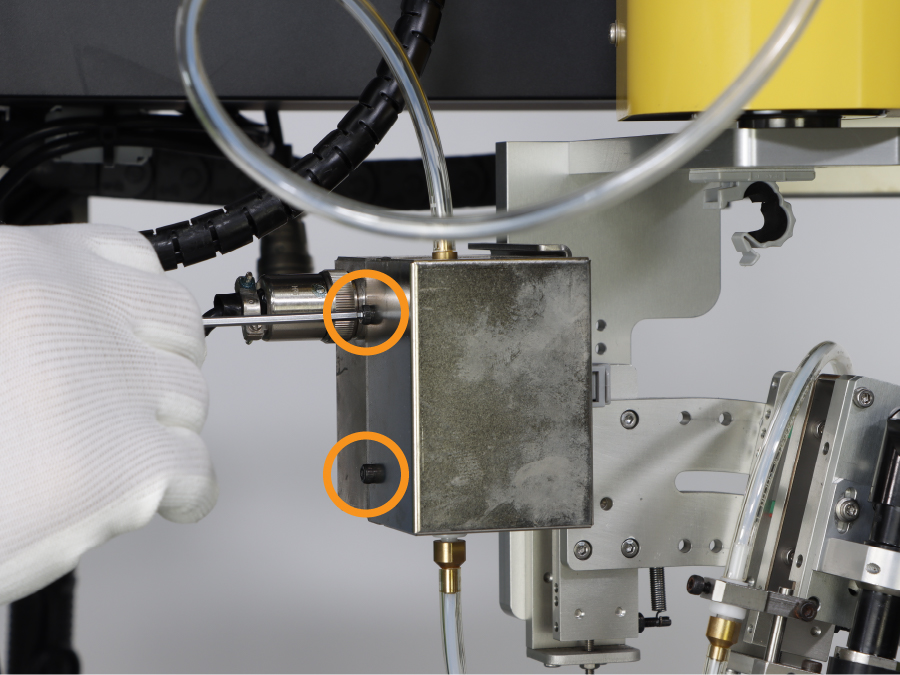
    Loosen the screws fix the feeder unit cover, and remove the cover from the feeder unit.

  4. Loosen the 2 screws with a hex key wrench to remove the tube unit and tube unit B from the feeder unit.

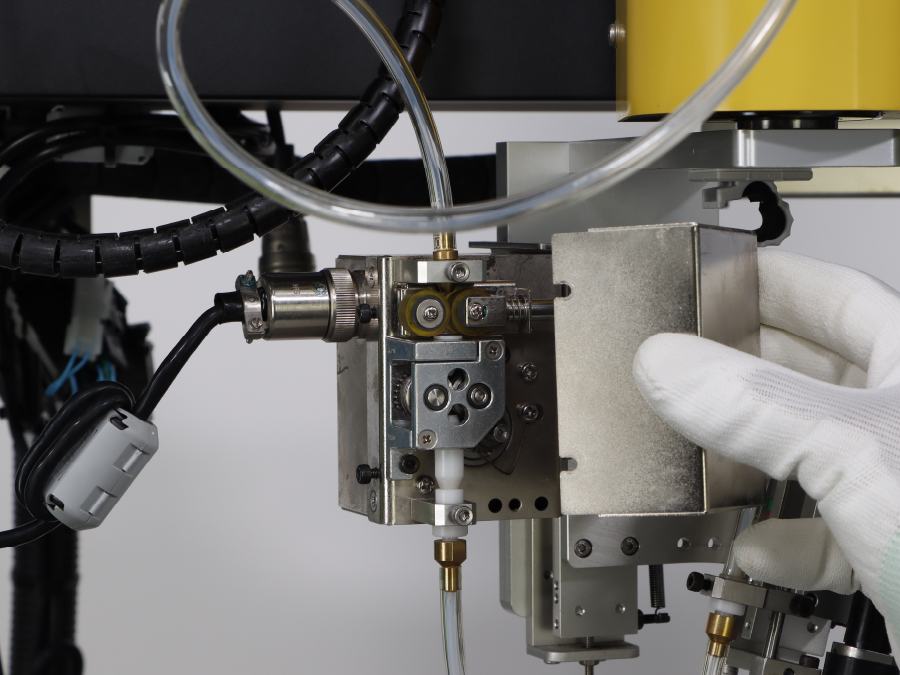
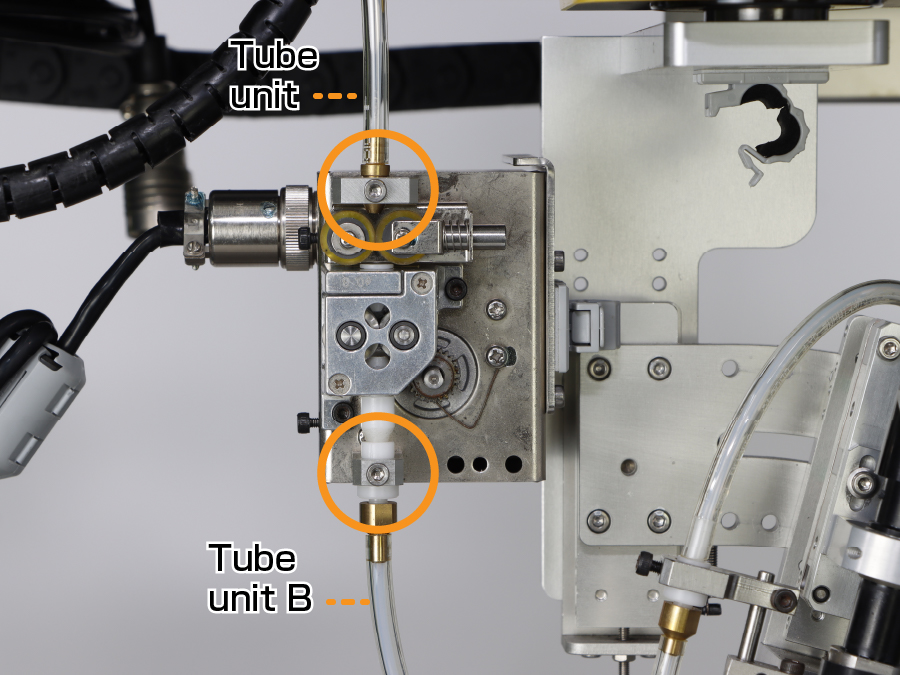
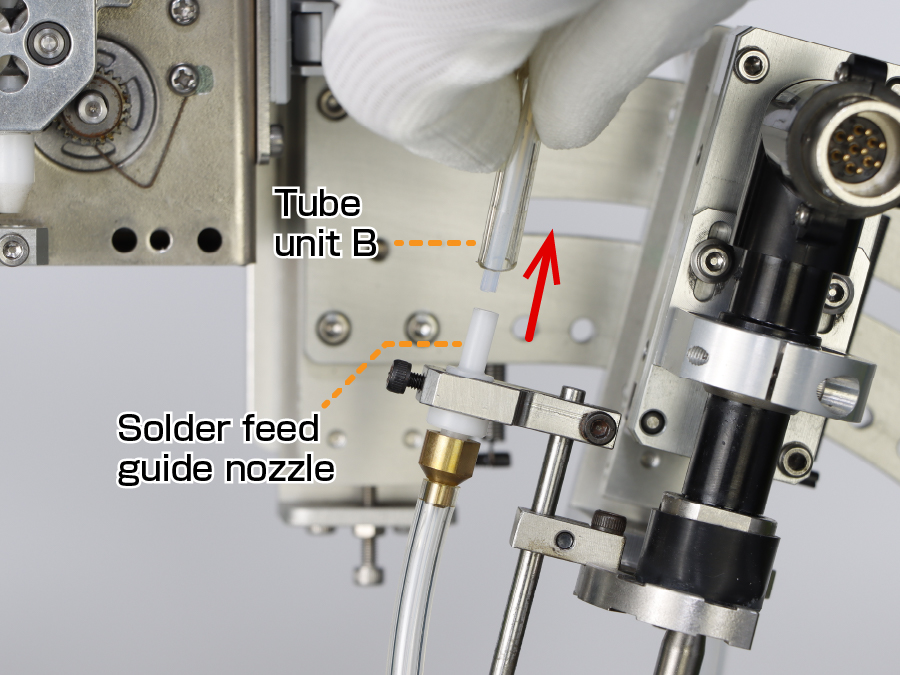
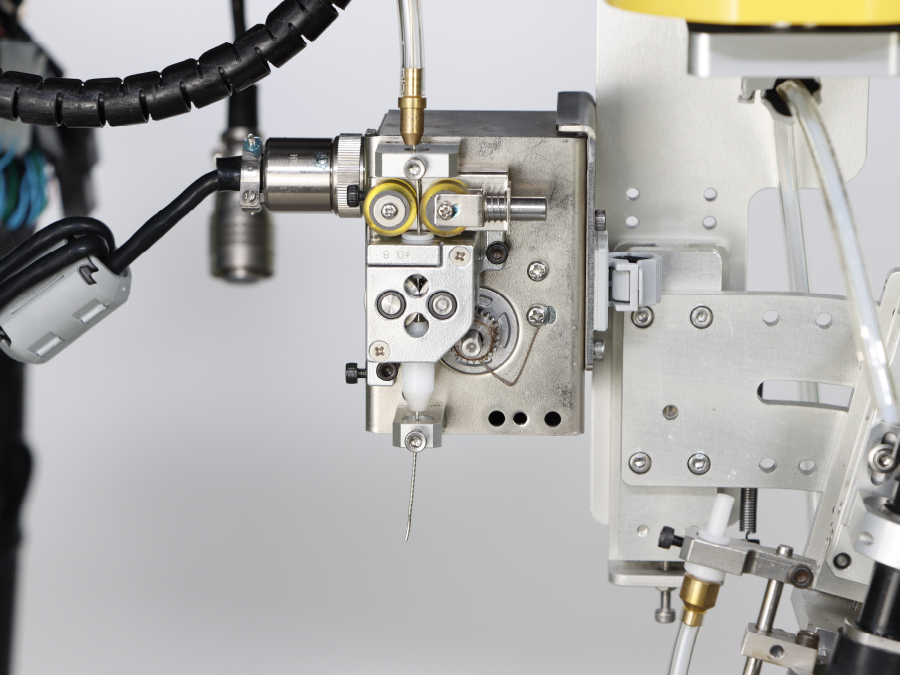
    Loosen the screws securing the tube unit and tube unit B, respectively, and remove the tube unit and tube unit B.

  5.  Detach tube unit B, pull out the solder, and remove another end of tube unit B.

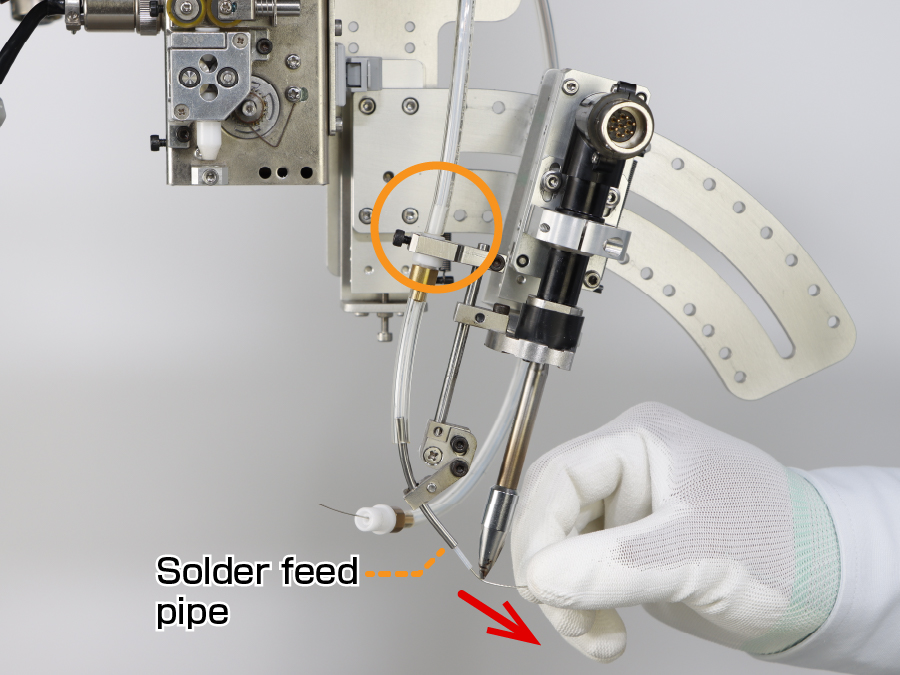
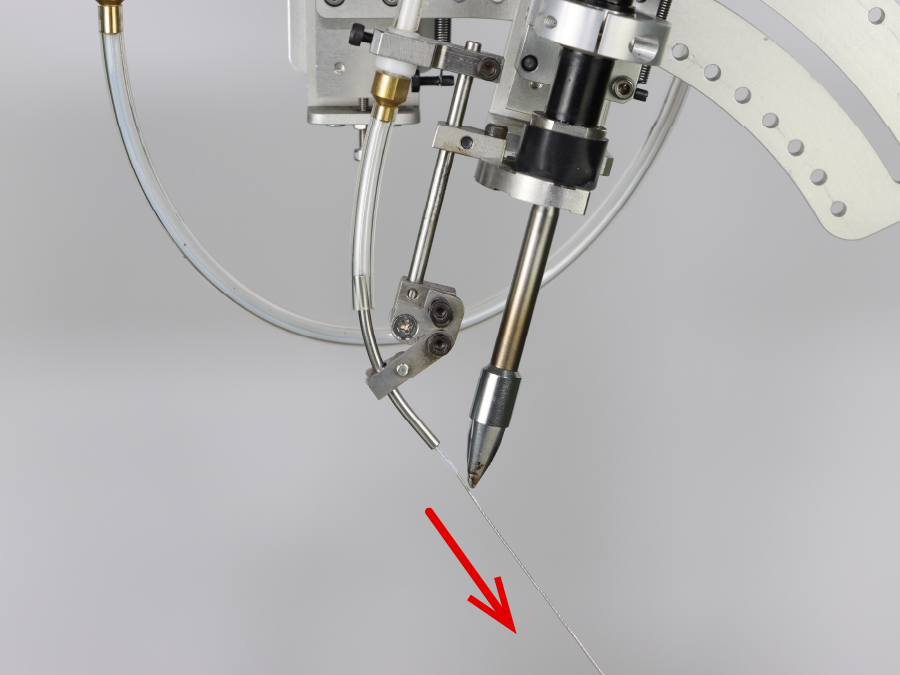
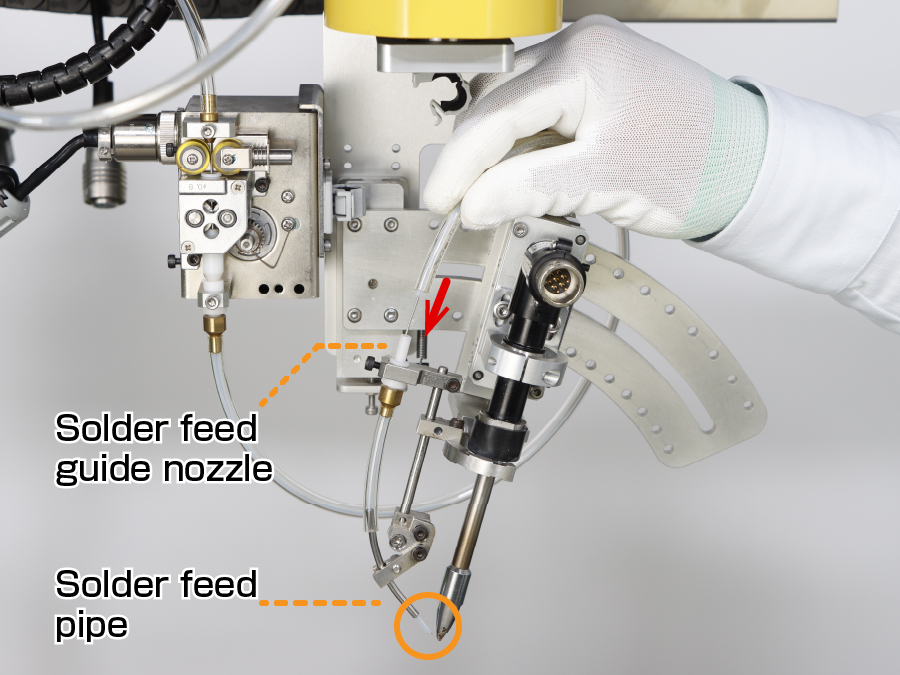
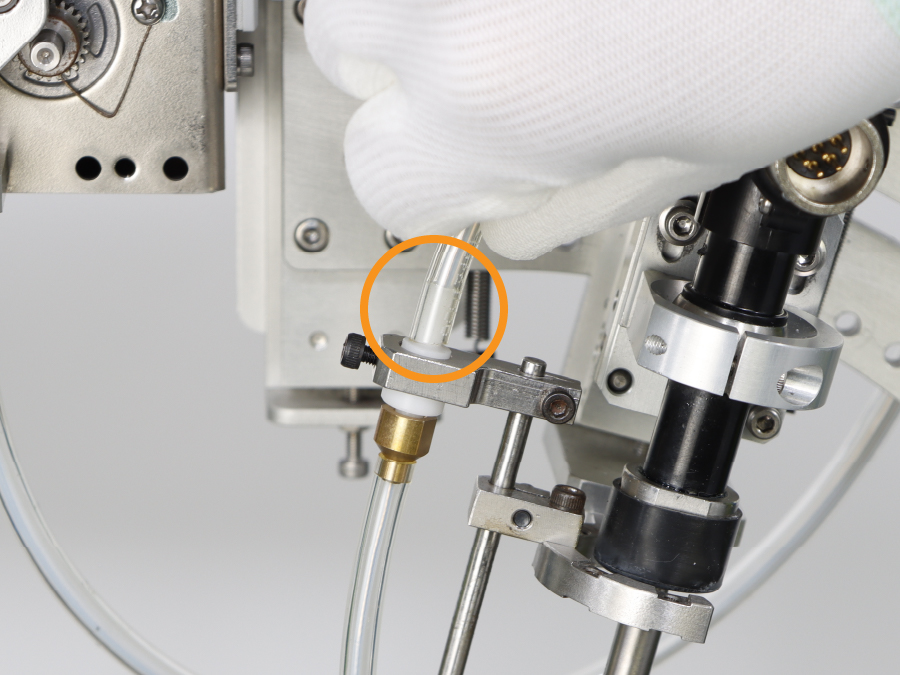
    After pulling out the remaining solder from the solder feed pipe, remove the other end of the tube unit B from the solder feed guide nozzle.

  6. Replace the solder bobbin

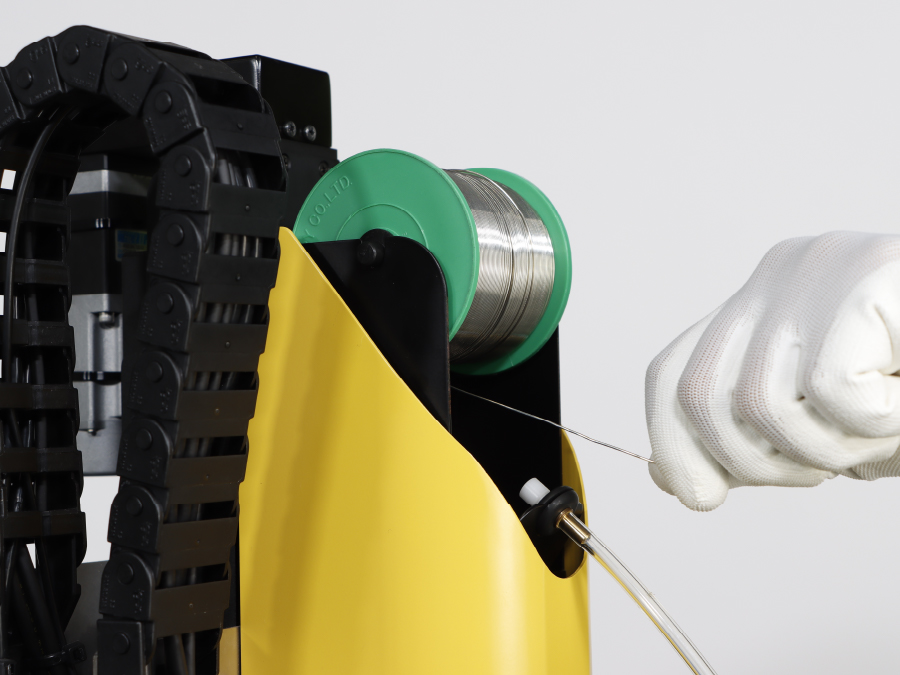
    Set the new bobbin so that the solder is fed from the back to yourself.

  7. Thread the solder wire into the tube unit, turning the solder bobbin.

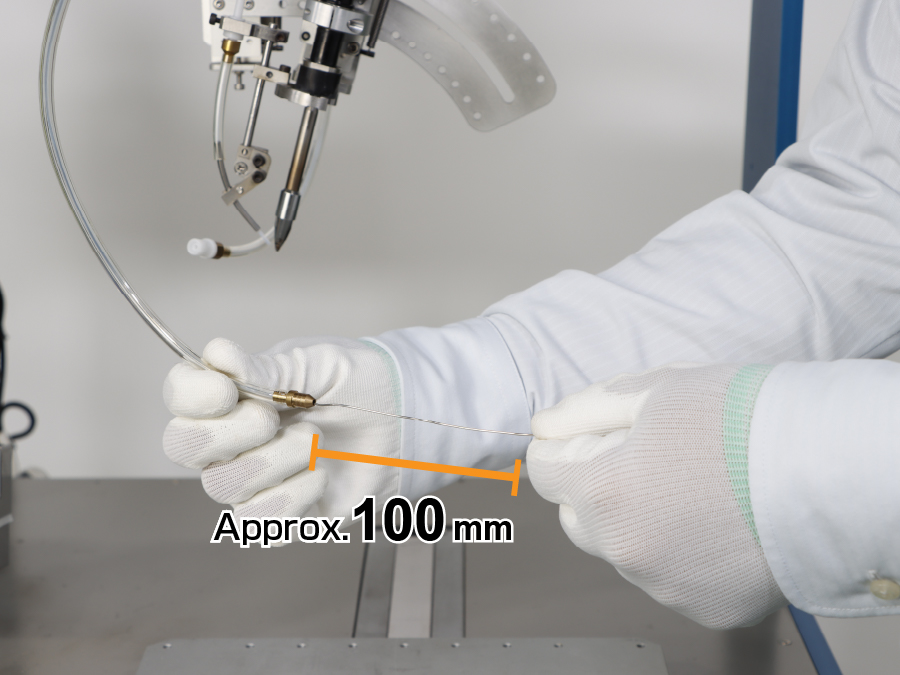
    Set the solder wire to protrude approx. 100 mm from the end of the tube unit.

  8. Thread the solder wire into the pulley unit.

    1. Tap the 'Solder Feed' button on the tablet PC to activate the pulley.
     
    2. Insert the solder protruding from the end of the tube unit into the pulley unit.

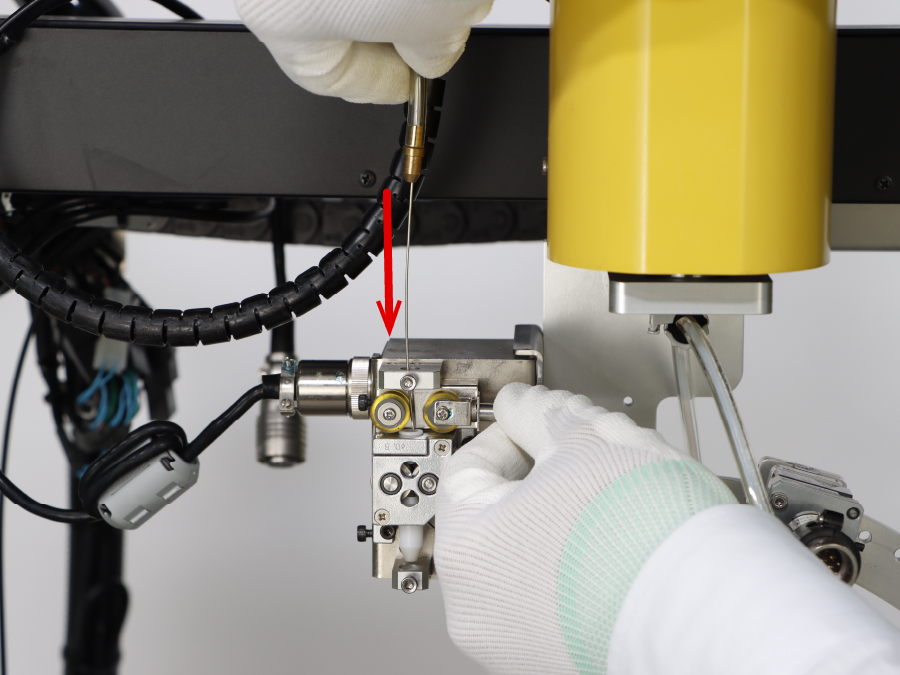
    Insert the solder protruding from the end of the tube unit into the pulley unit, pulling the roller which has a spring.

    3. Stop the pully as soon as you confirm that the solder wire comes out from the lower part of the pully unit.

    Stop the pully tapping the 'Solder feed' button on the tablet PC again.

  9. Insert the tube unit and tube unit B into the feeder unit, and fix them by tightening the screws with a hex key wrench.

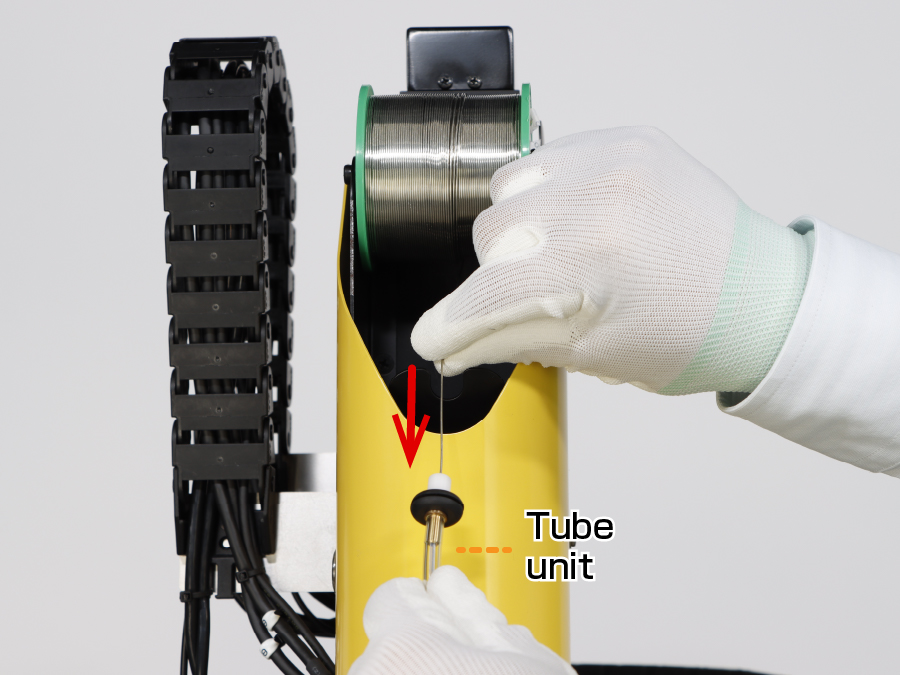
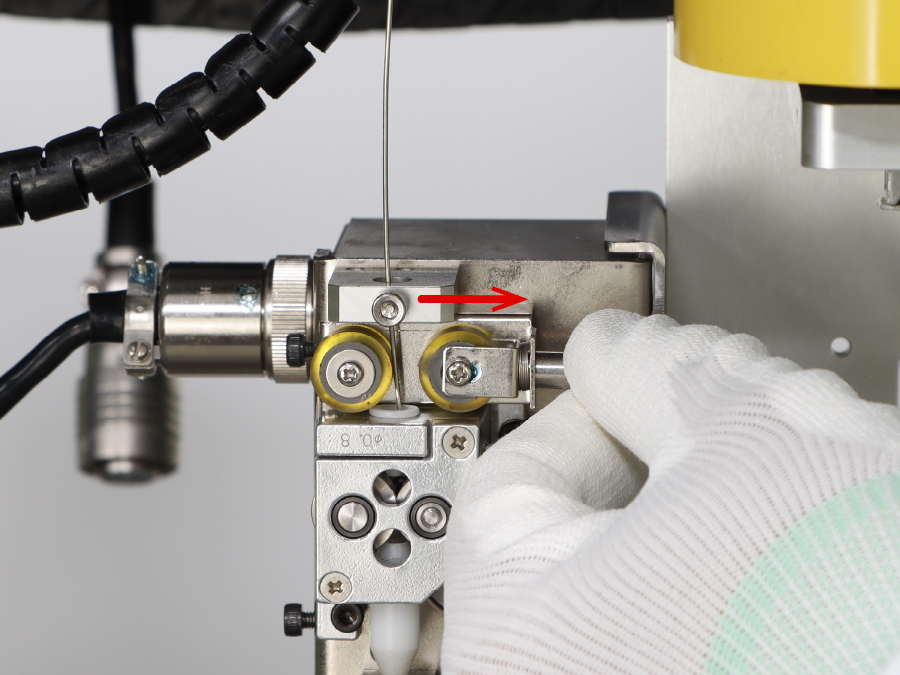
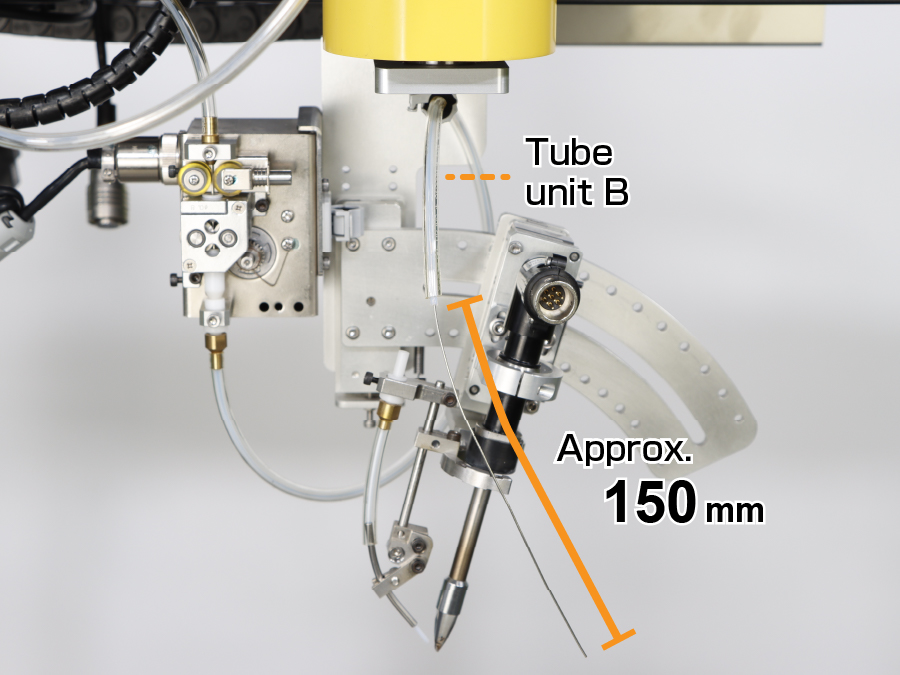
    In the case of tube unit B, insert it into the feeder unit after threading the solder wire, which protrudes from the lower part of the pulley unit.

  10. Tapping the 'Solder Feed' button on the tablet PC, thread the solder wire into tube unit B.

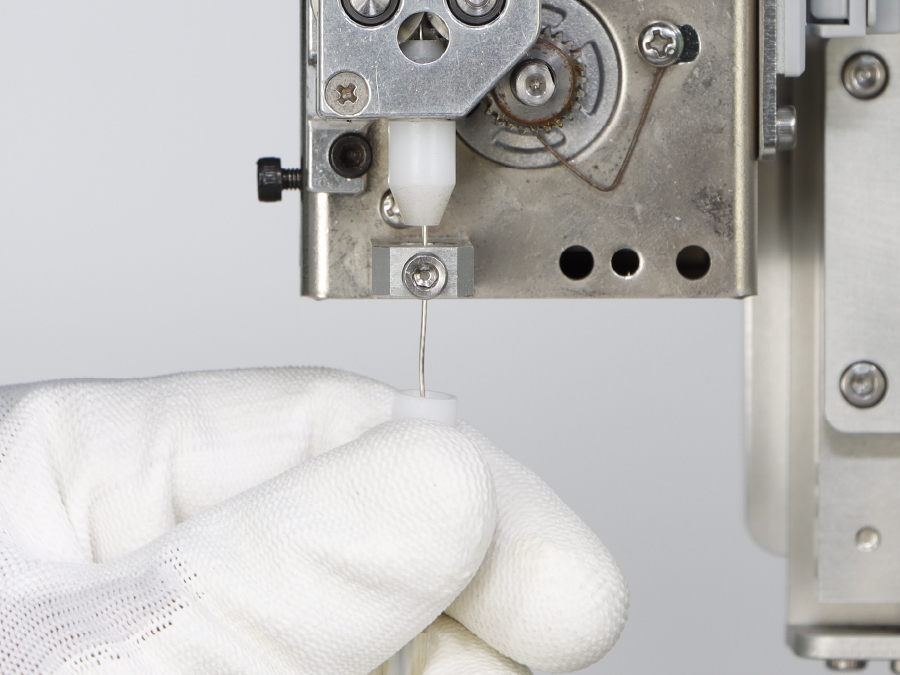
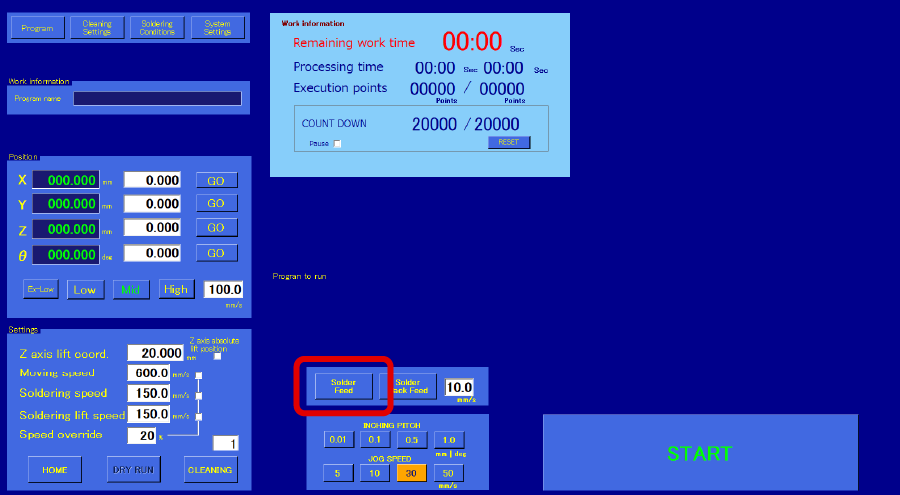
    Stop solder feeding by tapping the 'Solder Feed' button again when the solder wire protrudes approx. 150 mm from the end of the tube unit B.

  11. Thread the solder wire protruding from the end of tube unit B, into the solder feed guide nozzle.

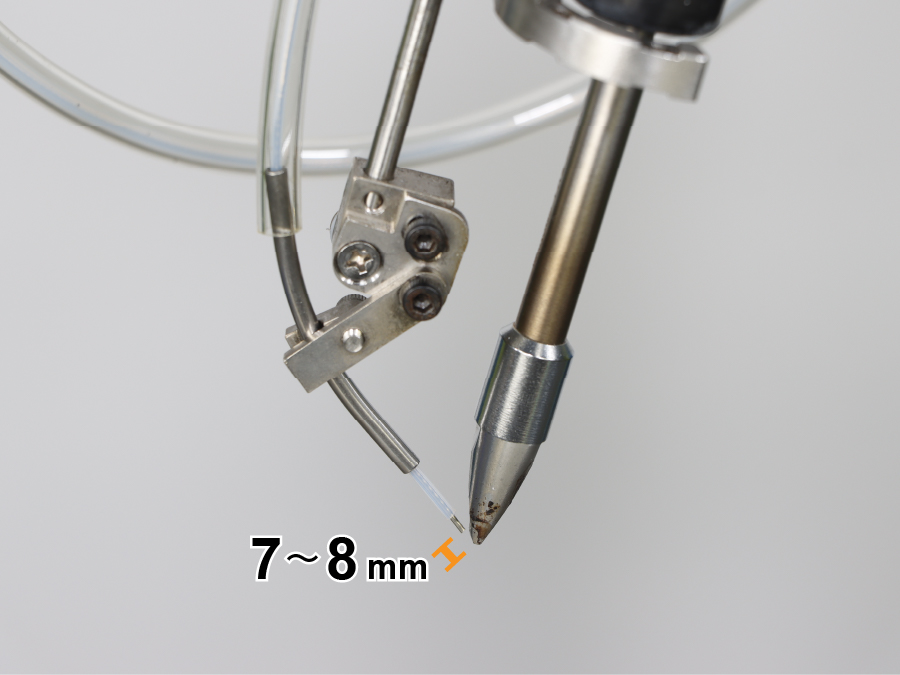
    Keep threading until a solder wire comes out from the solder feed pipe.

  12.  Attach tube unit B to the solder feed guide nozzle.

     
  13. Cut the solder wire protruding from the solder feed pipe at 7 to 8 mm from a soldering tip.

     
  14. Attach a feeder unit cover as the last step to change the solder bobbin.

    Tighten the 2 screws with a hex key wrench to fix the cover on the feeder unit.