MAINTENANCE/TROUBLESHOOTING/APPLICATION EXAMPLES
Top of Support & Service > MAINTENANCE/TROUBLESHOOTING/APPLICATION EXAMPLES > Preparation to use an FX-301B (parameter settings)
Set the parameters according to your usage conditions.
The following four settings are available with an FX-301B.
 is displayed, and you enter the parameter setting mode.
 button to determine.
Change the temperature display by pressing the UP or DOWN button.
 button to determine.
Change the solder type you use by pressing the UP or DOWN button.


 button to determine.
Switch the pot size for your use by pressing the UP or DOWN button.

Temperature range: 200 to 450℃ / 400 to 840℉
* This is the standard size that comes with the product when purchased.

Temperature range: 200 to 380℃ / 400 to 720℉
button to determine.Switch the ON and OFF of the timer with the UP button.


The time setting is available between 10 and 9990.
If you select and press the button, you can set the time for the timer.
The timer setting is available every 10 hours. 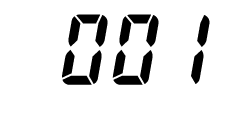 to
to  (10 to 9990 hours)
Press the button to determine when the time setting is done.
After the set time has passed,  will be displayed, the alarm will start sounding, and then the heater for the solder pot will be turned off. To reset the alarm and others, turn off the power switch and then immediately turn it on again. The timer will be reset to the above time setting.
Enter your desired time value in the timer setting of parameter setting mode.
If you want to reset the time setting in the middle, input your desired value after setting another value once.