MAINTENANCE/TROUBLESHOOTING/APPLICATION EXAMPLES
Top of Support & Service > MAINTENANCE/TROUBLESHOOTING/APPLICATION EXAMPLES > Maintenance of a soldering iron with a separate type tip and enclosure pipe
A soldering iron is a tool that supplies heat to melt solder. An enclosure pipe and a nut are essential parts for heat transfer.
A grounded soldering iron has the function of releasing static.
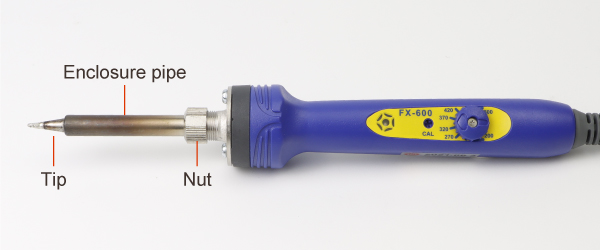
Flux, oxide, and carbide adhere to the enclosure pipe and the nut during soldering.
The adherence of oxide and carbide to the metal parts can negatively affect soldering quality by causing "degradation of heat transfer" and "increase in the tip to ground resistance."
In the case of a soldering iron with a separate type tip and enclosure pipe, maintaining the entire tip parts rather than only the tip end helps keep the original performance.
Make sure to unplug the unit for safety work.
Every part is quite hot just after unplugging the iron.
Please make sure that the metal parts are cool enough before starting the maintenance.
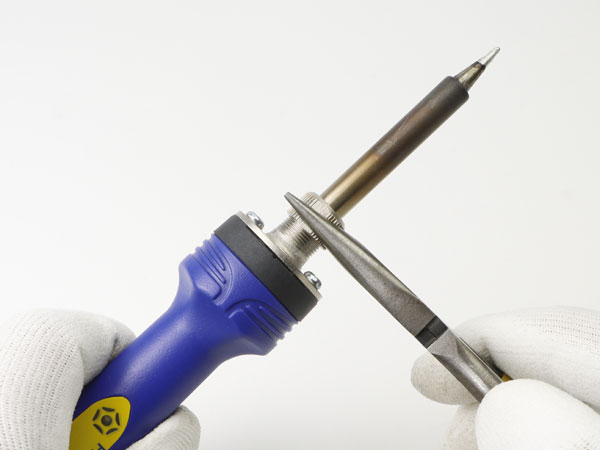
Loosen the nut with long-nose pliers to disassemble the soldering iron.
Disassemble the parts as shown in the photo below and confirm their conditions.
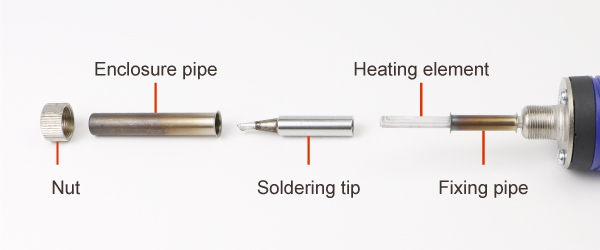
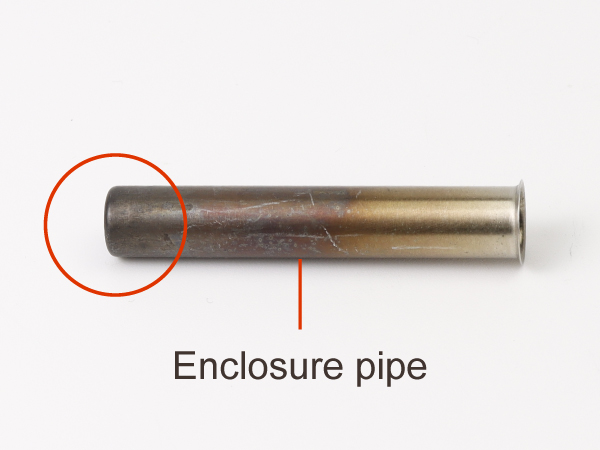
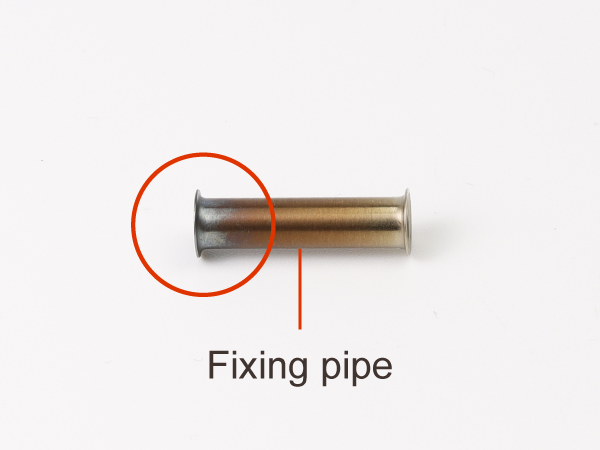
Nut, enclosure pipe, and soldering tip removed from the soldering iron
If oxidation becomes severe, seizing occurs in metal parts connections (parts sticking to each other), and disassembly becomes difficult. If disassembly is impossible, replace the seized parts.
Check here for the information on "seizing" of parts.
What if the tip replacement becomes impossible? (In case of a soldering iron with a separate type tip and enclosure pipe)If there are oxides and carbide on metal parts, such as the tip enclosure, remove them with sandpaper.
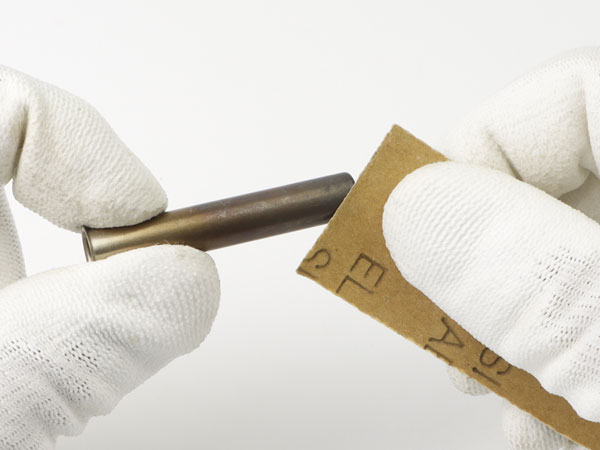
Do not scrub hard, but polish it with sandpaper gently.
Contact area with a tip
Contact area with a tip
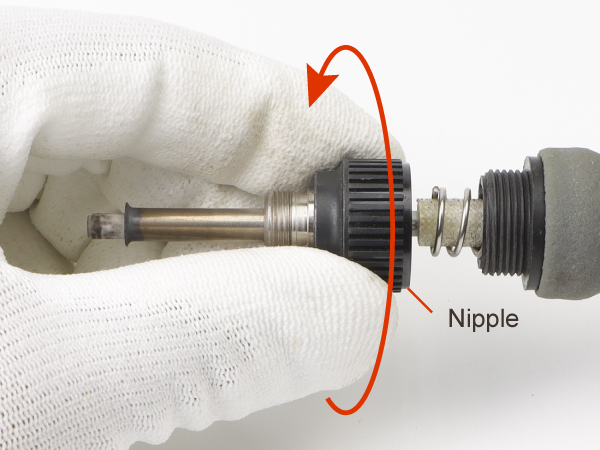
There is a chance of breaking the heater if polishing the pipe and nipples as assembled. Make sure to disassemble them before the maintenance work.
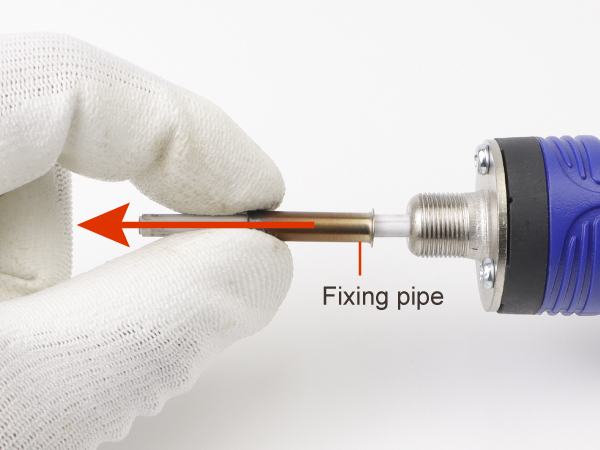
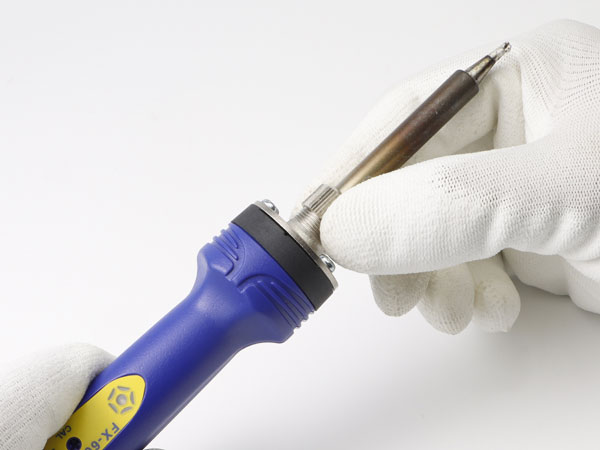
Slide the fixing pipe as indicated by the photo below and remove it.
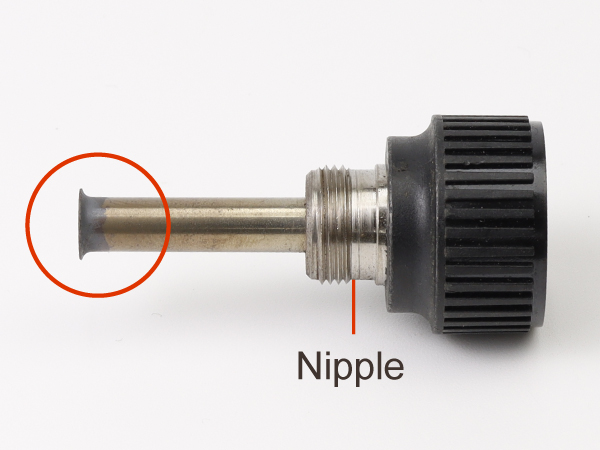
Turn the plastic part of the nipple counterclockwise and remove it.
After the maintenance, assemble the soldering iron in the reverse order of disassembly.
Assemble the parts in the order of a fixing pipe/nipple->tip->enclosure pipe->nut, and tighten the nut with fingers.
The tip will be too unstable for proper soldering if the nut is loose. Avoid getting burned and tighten the nut with fingers.